• Skip to primary navigation
  • Skip to main content
  • Skip to primary sidebar
Search Over 25 Million Graphics
Join GraphicsFuel Premium Membership and get access to graphics, mockups, vectors, icons, and more. New designs added weekly!Only $10/month
GraphicsFuel

GraphicsFuel

Free PSD, Graphic & Web Design Resources | GraphicsFuel

  • Categories
    • Backgrounds
    • Brushes
    • Design Articles
    • Design Inspiration
    • Fonts
    • Free Photos
    • Free PSD Files
    • Graphics
    • Giveaway
    • Icons
    • Logos
    • Mockup Templates
    • Patterns
    • Photoshop Gradients
    • Photoshop Tutorials
    • Premium
    • PSD Templates
    • Sketch App Files
    • Text Effect
    • Textures
    • UI & Mobile Apps
    • Vectors
    • Website Layouts
    • Websites
  • Shop
  • Info
    • About
    • Advertise
    • FAQs
    • Terms of Use
  • Contact
  • Go Premium
  • MEMBER LOGIN

Create a 3D text effect in Photoshop

Free PSD FilesJul 25, 2011

Friends, today’s Photoshop tutorial is about how to create 3D text effect in Photoshop using editable text and layer styles.

Step 1

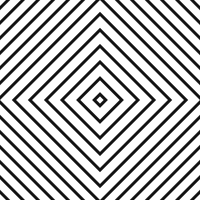
Let’s first create the background. Take a new PSD document, size 800 x 400 pixels and add a new layer (Ctrl+Shift+N) with background color #232323. Apply the following layer effects to the background. I have used one custom made pattern and you can download it from here.

Now to give more effect to the background, take a new layer and pick up 400 pixels soft round brush. Just move your cursor to the center of the background and hit one click of your mouse.  You’ll see a white patch; reduce its transparency to 50% from the layer opacity option. Set the layer’s blending mode to Color Dodge.  Here’s the result you will get.

Step 2

Now that the background is created, let’s go the actual text effect. Click the Type Tool and write 3D Text on the document with font size 115 pt. I have taken Arial Black Italic font. Here’s a screenshot of what I get.

Now apply the following layer styles from the Blending Options.

Here’s the result I got after applying the above styles.

Step 3

Now comes the important 3D part of the text. Duplicate the 3D text layer (Ctrl+J) and move it down 1 step (Ctrl+{) and then with your Arrow Keys on your keyboard move the text by hitting the Down Arrow Key and Right Arrow Key 6 times each.  Now hide the top 3D Text layer by clicking the Eye icon.  It’s time to apply the following layer styles from the Blending Options to the 2nd 3D text layer.

Here’s the result I got after applying the above styles.

Now unhide the top 3D Text layer and lo, this is the wonderful 3D text effect you’ll get finally. Sounds good!

You can even play around with different colors and styles to get your own 3D text effects. Let me know your thoughts on this Photoshop text tutorial by leaving your comments in the comments box. Thanks much!

Author: Rafi
File Resolution: 800x400 pixels
File Format: PSD
Keywords: 3D text effect, Photoshop Tutorials
Size: 0.52 MB  (zip

Download 3D Text Effect PSD File

Share this:

  • Click to share on WhatsApp (Opens in new window)
  • Click to share on Facebook (Opens in new window)
  • Click to share on Pinterest (Opens in new window)
  • Click to share on LinkedIn (Opens in new window)
  • Click to share on Twitter (Opens in new window)
  • Click to share on Tumblr (Opens in new window)
  • Click to share on Reddit (Opens in new window)

Subscribe Now

Thank you! You have successfully subscribed to our newsletter.

Subscribe Now

& get a free design bundle with 20 files

Related Posts

Light Music UI Design Kit (PSD)

Light Music UI Design Kit (PSD)

4 Free Real Photo Frame Mockups

4 Free Real Photo Frame Mockups

Outdoor Signs and Facades Mockup PSD

Outdoor Signs and Facades Mockup PSD

Reader Interactions

Comments

  1. allen says

    November 20, 2013 at 3:18 am

    Good job!!

    Reply
  2. DOF says

    September 19, 2013 at 3:31 am

    Good 3D text effect in Photoshop tutorial
    Thanks

    Reply
  3. Addy says

    December 15, 2012 at 1:44 pm

    I think not let to say thanks a lot . . . very usefull tutorial. Keep it up for next

    Reply
  4. Sandeep Yadav says

    September 25, 2012 at 11:08 pm

    I was looking for logo text for my wallpaper website and finally i got it here. Thanks for attached PSD file.
    Thanks

    Reply
  5. amirashkan says

    September 2, 2012 at 1:27 pm

    Very Goog!!

    Reply
  6. Bilal Aslam says

    May 24, 2012 at 2:53 am

    last step ,,, plzzz manshn

    Reply
  7. Bilal Aslam says

    May 24, 2012 at 2:52 am

    grate job ,,,

    Reply
  8. kaboo says

    April 6, 2012 at 3:03 pm

    oooh the last step :((((((

    Reply
  9. iklan mobil bekas says

    October 14, 2011 at 10:12 am

    Very nice result. Keep up the good work!

    Reply
  10. Wesley says

    July 26, 2011 at 1:25 pm

    Nice Tut Rafi. Love the site and Keep up the awesome work.

    Reply
    • Rafi says

      August 1, 2011 at 10:16 am

      Thanks much, Wesley. I appreciate you liked the tut. More tuts coming soon, so keep visiting.

      Reply

Leave a Reply Cancel reply

Your email address will not be published. Required fields are marked *

Primary Sidebar

  • Dribbble
  • Facebook
  • Google+
  • Instagram
  • Pinterest
  • RSS
  • Twitter

Thank you! You have successfully subscribed to our newsletter.

Subscribe & get a free
Design Bundle with 20 files

I accept the privacy policy and would love to receive emails.
Ad Banner for Tailor Brands an Automated logo design and branding company

GraphicsFuel Premium

Boost up your creative design workflow with our best premium design assets with a commercial license. Join our membership and get instant access to our huge assets library. Plus weekly fresh resource updates!

Discover Premium

Copyright © 2025 GraphicsFuel. All rights reserved.
About Us | Advertise | FAQ | Terms of Use | Privacy Policy

  • Dribbble
  • Facebook
  • Google+
  • Instagram
  • Pinterest
  • RSS
  • Twitter
We use cookies to ensure that we give you the best experience on our website. If you continue to use this site we will assume that you are happy with it.AgreePrivacy Policy