Want to learn how to vectorize an image in Photoshop? If there are any changes in resolution, raster images will pixelate; vector images, on the other hand, are created by a mathematical formula and can be resized without losing quality.
Although this is more commonly done in Illustrator, there’s a quick way of doing it in Photoshop too.
We’ll teach you the simplest method of how to convert any raster image into a vector in 8 steps. This will make your graphic design project much easier.
If you have high skills in Photoshop and are ready to do the tutorial yourself, open the image you will be modifying first. To do this, go to File > Open, and navigate to the folder that contains your picture.
An important thing to note here is that you need a high-resolution image. They have more information stored in them and you will be able to create more detailed vectors.
Our photo has a simple background, but if the image you want to vectorize in Photoshop has a busy background, you’ll have to remove it beforehand. Remember, the best are the photos with a white or black background.
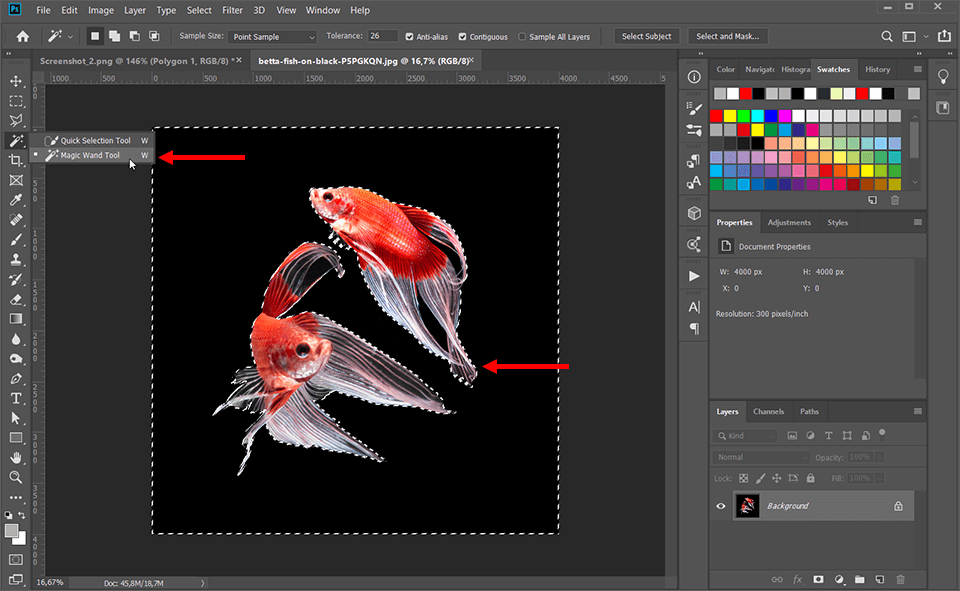
Separate the Object
The next step of vectorizing in Photoshop is creating a selection. The object needs to be separated from the background for further operation. There’s a number of tools that can help you achieve that.
You can choose any tool that is convenient for you, but we recommend using the Magic Wand Tool(W). It is the easiest and quickest way to do it, as it selects pixels according to the tone and color.
Find it in the toolbar to the left of your screen.
Then, click on the object to select it.
If the selection comes out not completely accurate, you may need to refine it. To add to it, shift-click any unselected areas, or hold down Alt/Opt key and click on the areas you want to subtract.
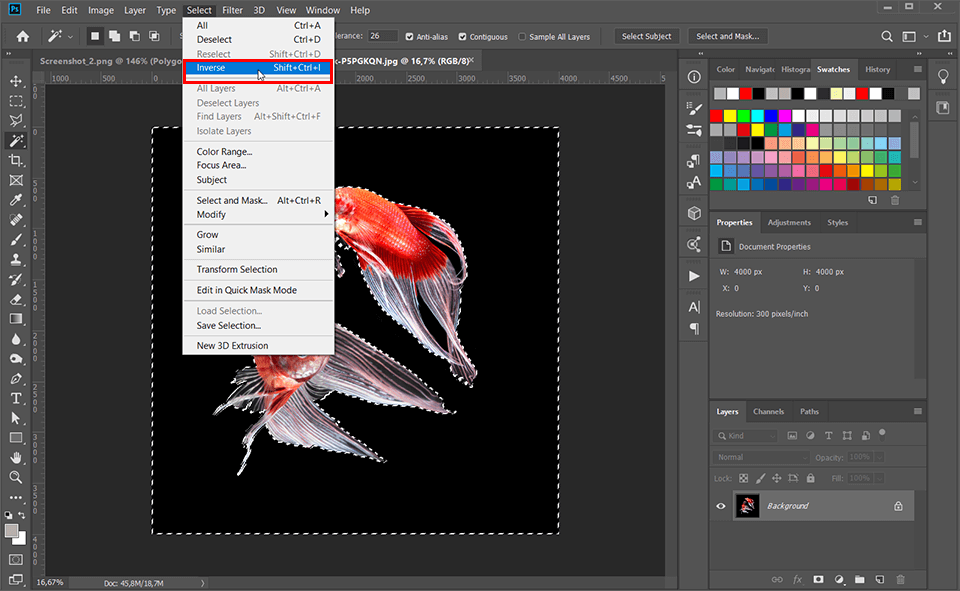
Inverse the Selection
Once you have done that, you’ll have to inverse your selection. Go up to the “Select” menu at the top of your screen and select “Inverse” from the dropdown list that appears. If you prefer using hotkeys for quicker access, use the Shift+Ctrl+I/Shift+Cmd+I key combination.
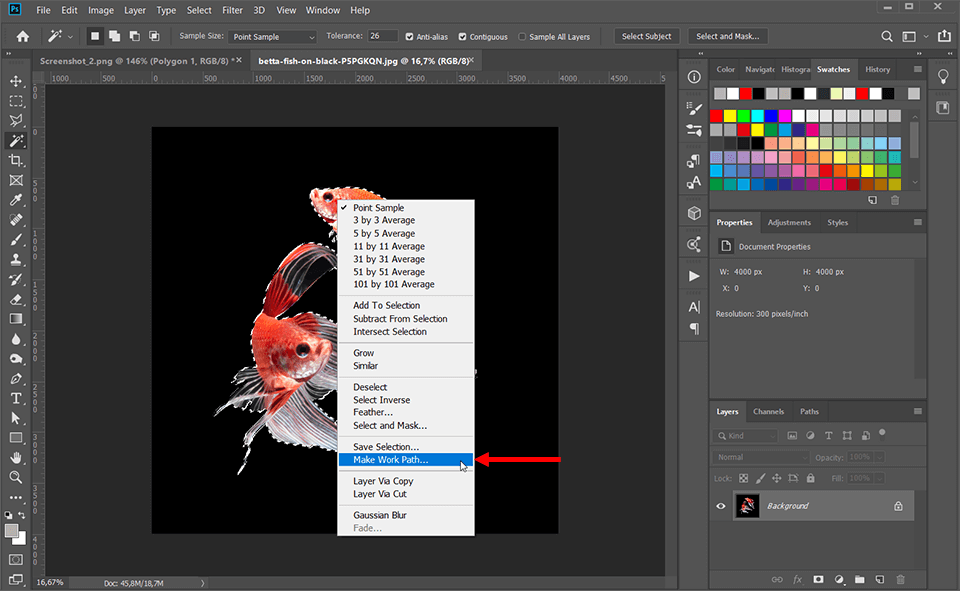
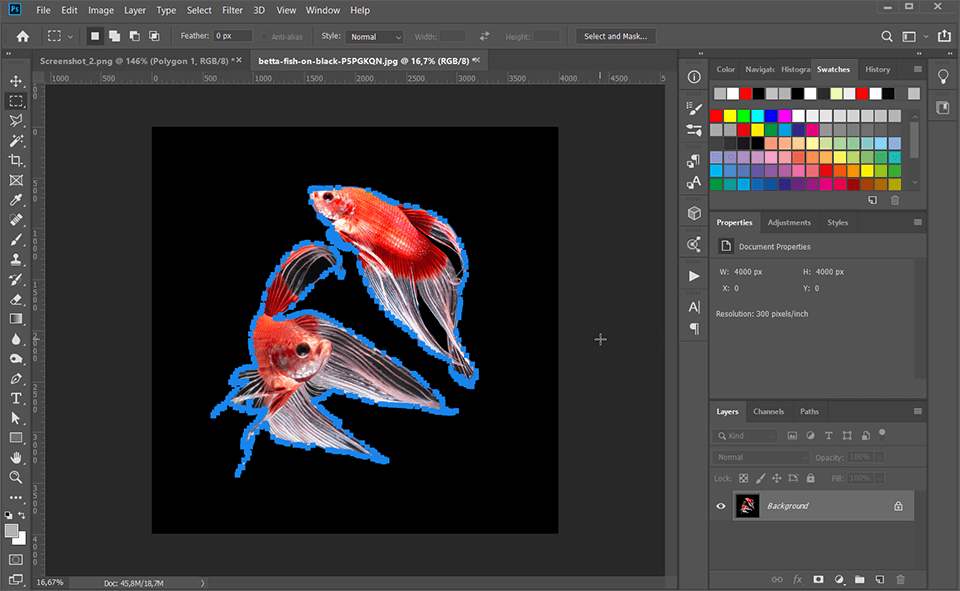
Convert the Selection to a Path
A vector consists of paths. That’s why, an important step of learning how to vectorize an image in Photoshop, is turningyour selection into a path. In order to do this, right-click the object, and choose “Make Work Path” from the flyout menu. It’s going to be the first option you’ll see.
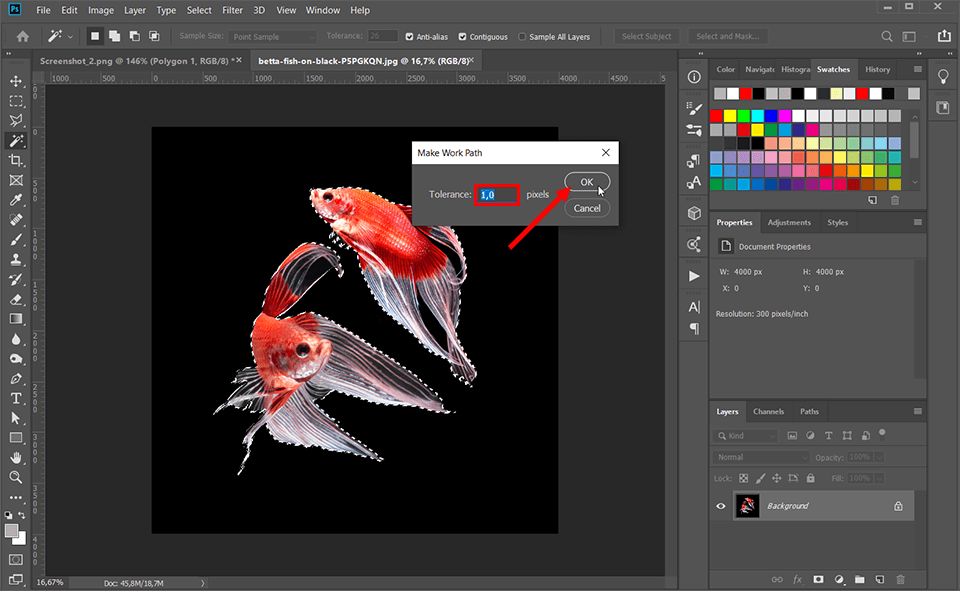
Enter the Tolerance
Next, set a tolerance level for the pathways in a dialogue box that pops up. It can range from 0.5 to 10 pixels. The higher that value is, the smoother the curves of the vector shape, but also the less detailed.
We recommend using a tolerance of 1,0 px. A rule of thumb here is to set the value according to how complicated your shape is – the simpler it is, the higher the value. You may need to experiment a bit to get the right result for you. Once the tolerance has been set, click “OK” to save the changes.
The marching ants will now become a blue vector line in the shape of your selection.
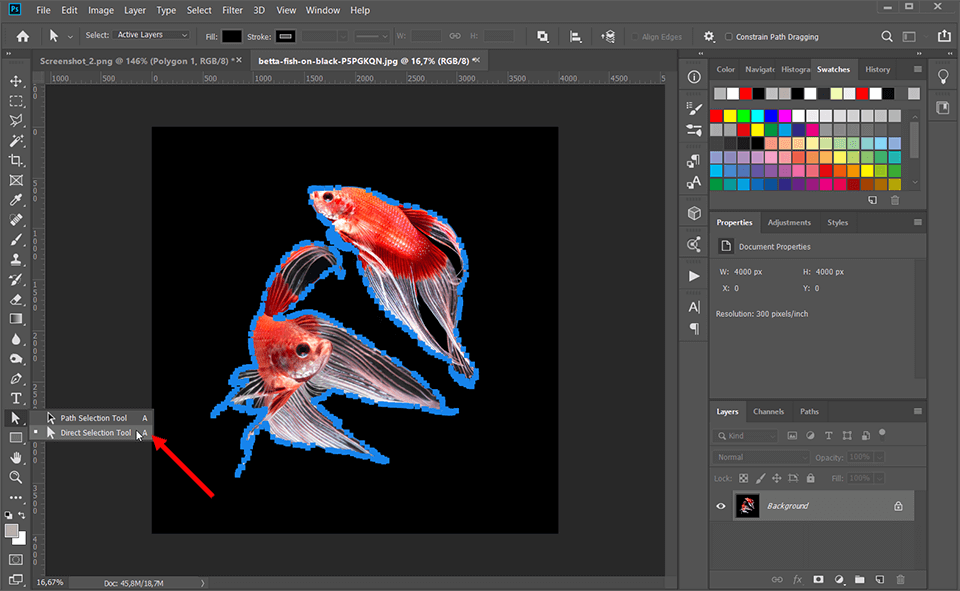
Select the Direct Selection Tool
Choose the Direct Selection Tool(A). You will find the tool on the left side in the Toolbar section.
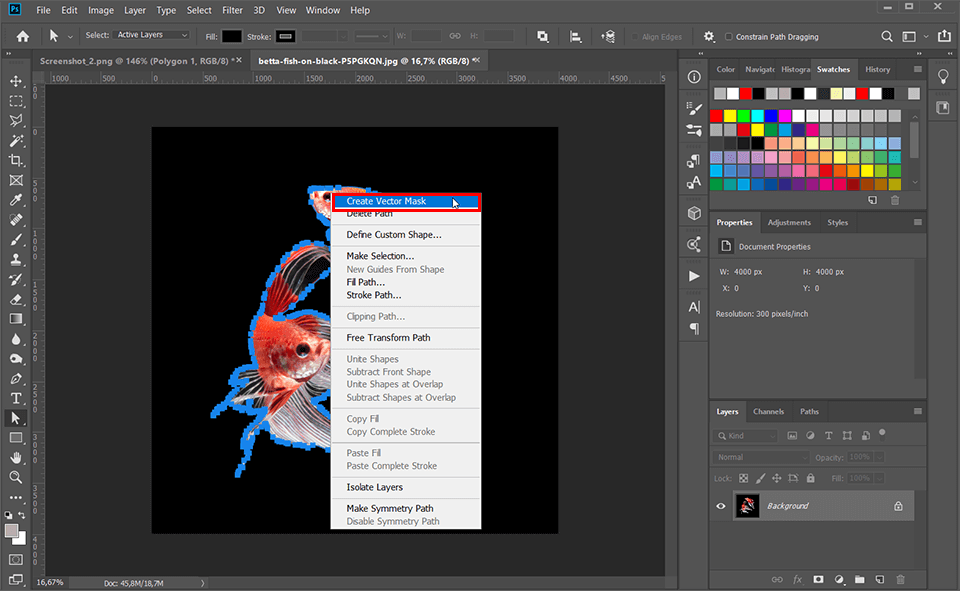
Create Vector Mask
The final step of vectorizing in Photoshop is creating a vector mask, that will clip out the contents of the layer. To do this, right-click the object and select the “Create Vector Mask” option from the dropdown menu that appears.
Save the Final Result
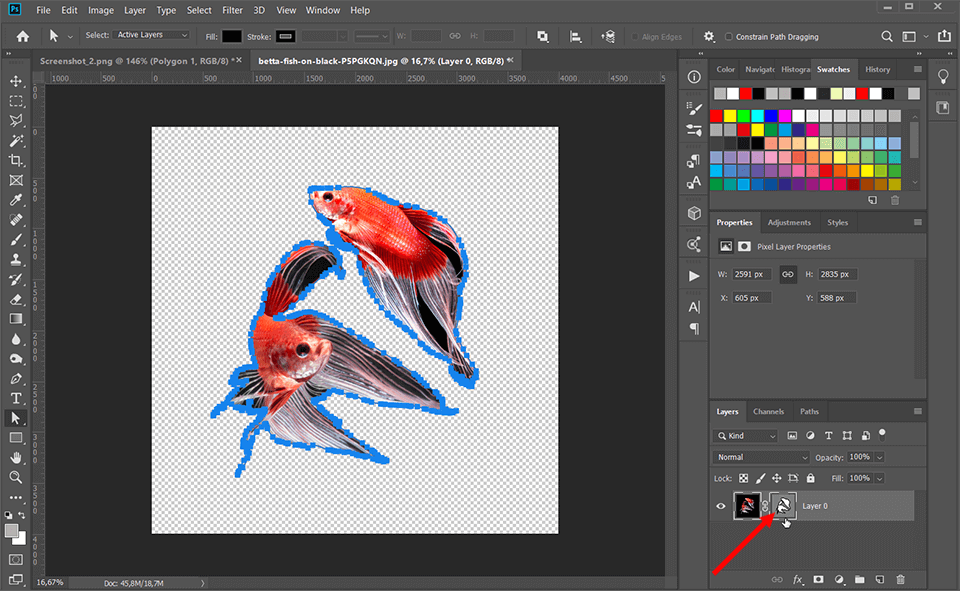
Good job! Your vector is now ready, and the image is completely resolution-independent. No matter how big or small you’ll make this image, it will never pixelate. You’ve successfully completed the tutorial and learned how to vectorize an image in Photoshop.
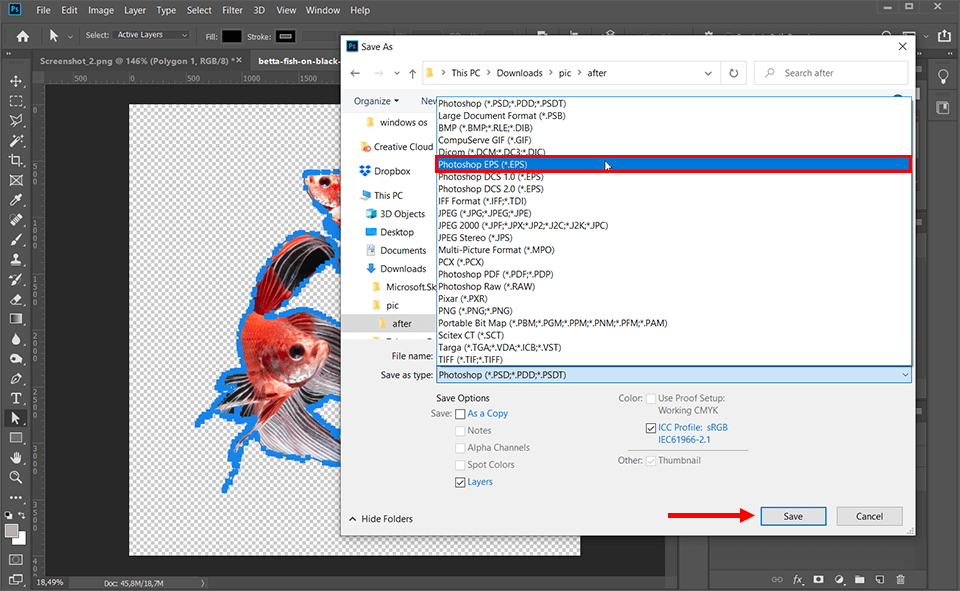
All there’s left to do is save the file in EPS file format. Navigate to File > Save As, or use the key combination Ctrl+Shift+S/Cmd+Shift+S. Go to “Save as type” and choose “Photoshop EPS.”
Confirm your actions by clicking “Save.” Now you can further work with your vector and create graphic designs in free vector graphics software. You can use your vector image to create logos, icons, and other graphical content.
We use cookies to ensure that we give you the best experience on our website. If you continue to use this site we will assume that you are happy with it.AgreePrivacy Policy


Leave a Reply